Introduction
This guide will walk you through the basic setup process for a Raspberry Pi, including how to install Raspberry Pi OS Lite and enable SSH access. Once complete, you’ll be ready to dive into any of my Pi-powered projects!
Some of my other guides, build off of the same Raspberry Pi setup, so, rather than repeating these steps in every post, this guide will serve as a reference for getting your Pi up and running with a clean, lightweight, and secure Linux environment.
By the end of this walkthrough, you’ll have:
- Raspberry Pi OS Lite installed,
- SSH access enabled,
- Your Pi connected to your home network,
- And your system updated and ready to follow any of my other guides.
Prerequisites
- Hardware: A Raspberry Pi capable of running a 64-bit OS and a Micro SD card with at least 32GB of space.
- Visit the Raspberry Pi’s Operating system images article to see a full list of compatible models.
- OS: Raspberry Pi OS Lite or any other Linux distribution (64-bit).
- Network: Ethernet (preferred) or strong Wi-Fi connection
- Tools on your computer: PuTTY or any other SSH client.
Raspberry Pi Setup Steps
- Install PuTTY on Your Computer
- Visit the PuTTY website on the computer you wish to SSH (remote connect) to your raspberry pi on.
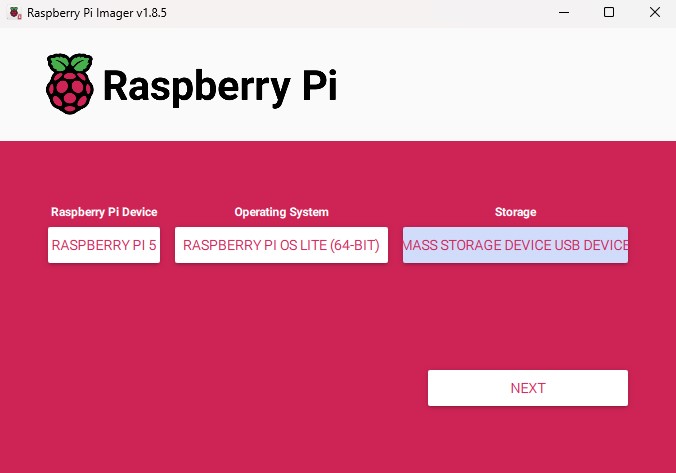
- Install Raspberry Pi OS on an SD card
- Using the Raspberry Pi Imager install the Raspberry Pi OS Lite (64-bit) and insert the card into your Pi’s SD card slot.
- I recommend installing the Lite version to reduce the load on your pi because we will connect via SSH and won’t need the GUI.
- To ensure proper compatability across all of my guides, I also recomend installing the 64-bit system. Specificly, my guide Hosting a local LLM (Linux Recommendation) requires a 64-bit system to work correctly with the projects dependencies.
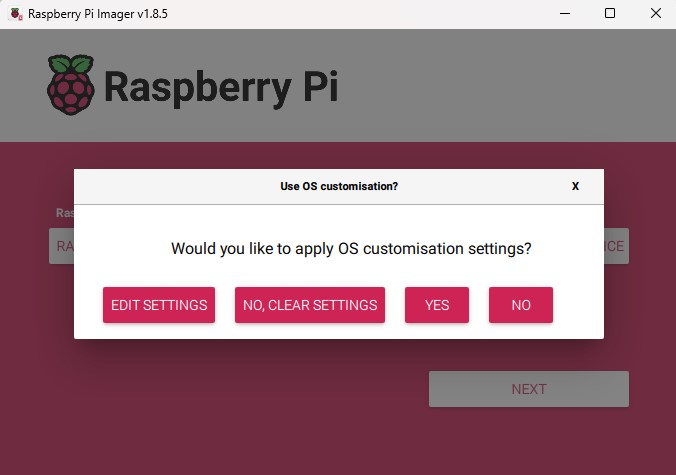
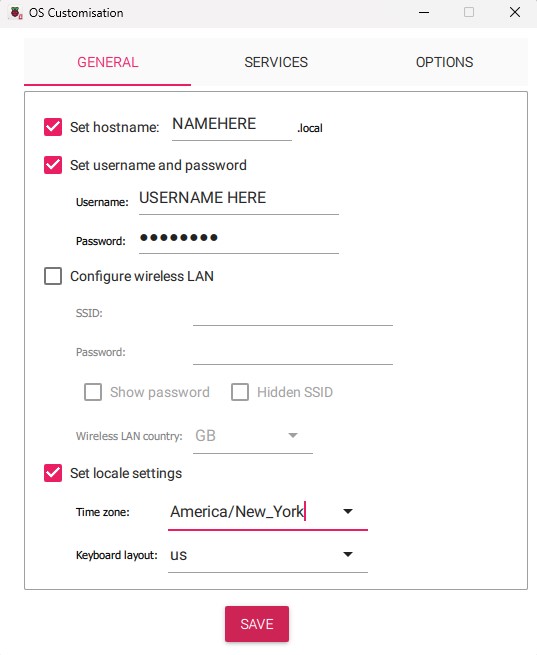
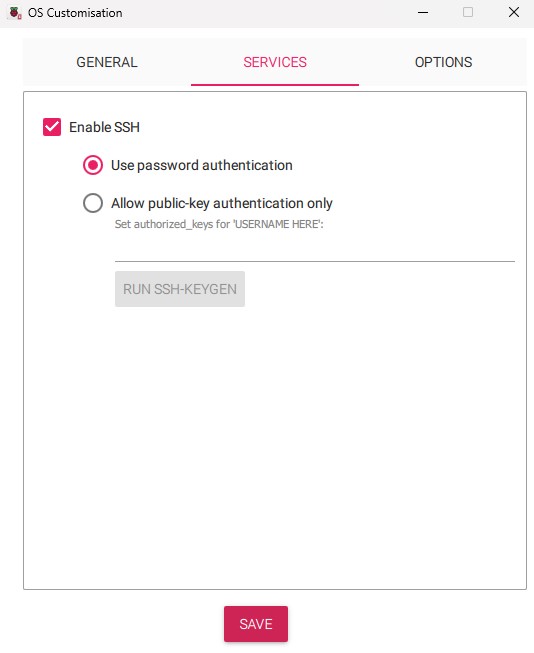
- Before finishing your install you’ll want to edit your settings in the OS customization popup window.
- Here, you’ll want to set your hostname, username, and password. Keep note of the credentials you set up here because you will use them later to login to your Pi using the PuTTY application you installed in step 1.
- You will also want to open the
Servicestab and make sure “Enable SSH” is on before you write the OS to the SD card so you can use PuTTY to SSH to the Pi later.
- Using the Raspberry Pi Imager install the Raspberry Pi OS Lite (64-bit) and insert the card into your Pi’s SD card slot.
- Setup your Raspberry Pi
- Plug the raspberry pi into power, and connect it to your router with an ethernet cable.
- SSH into your Raspberry Pi
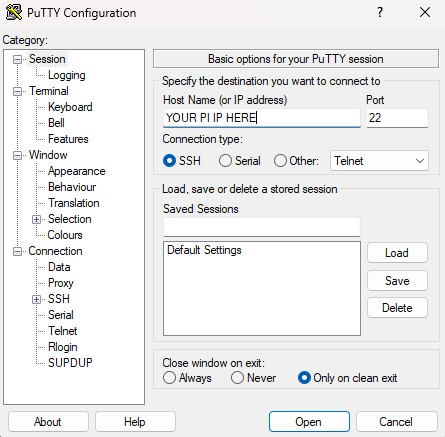
- In order to SSH into your Pi you will need to find its IP address. The easiest way to find it would be by logging into your router and locating your pi’s set hostname, from step 2.3, in the client list. Here you should also see your Pi’s assigned IP address.
- Next, launch the PuTTY application on your other computer and type your Pi’s IP in the Host Name text box and hit enter. (see image below)
- Once you hit enter you will need to accept that you are the owner of the device and log in using the username and password you created in step 2.
- Note: You will not see your username or password as you type them to increase security.
- Update and Upgrade your Pi to the Latest Version
- Once loged into your pi using PuTTY, run the following command to update and upgrade your raspberry pi to the latest Raspberry Pi OS version.
sudo apt update && sudo apt upgrade -yThat’s it! Your Raspberry Pi is now fully set up and ready to go! 🎉 With the basic set up out of the way, you’re free to dive into all kinds of fun projects! If you’re looking for inspiration, be sure to check out my other Raspberry Pi inspired posts linked below.
Related Posts
-

Hosting a local LLM (Linux Recommendation)
Read More: Hosting a local LLM (Linux Recommendation)Summary
This guide walks you through hosting a local large language model on Linux. It covers everything from installing key dependencies to choosing the right model for your machine’s hardware. You’ll get clear, step-by-step setup commands and my personal recommendations to help you spin up your own local AI on a Linux based OS.
Leave a Reply